

STAY SHARP - HOW TO SHARPEN YOUR KNIVES
Knives do not stay sharp forever. They need to be honed regularly and sharpened occasionally.
Honing Your
Knife
RENEW THE CUTTING EDGE
Under a microscope, you would see that the edge of a knife is made up of thousands of small cutting teeth. Through use, the fine teeth will eventually become misaligned, resulting in a dull knife. It is important to realign the teeth on a regular basis, aka honing, to renew the cutting edge.
Under a microscope, you would see that the edge of a knife is made up of thousands of small cutting teeth. Through use, the fine teeth will eventually become misaligned, resulting in a dull knife. It is important to realign the teeth on a regular basis, aka honing, to renew the cutting edge.
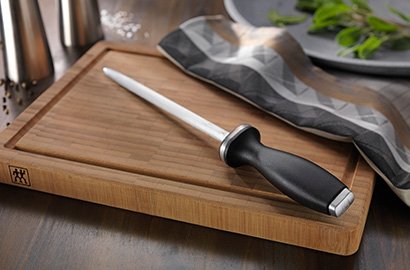
1. PREPARATION
It's up to you if you want to use a sharpening steel or a handheld knife sharpener for honing your knives. The handheld is really easy to use. For fast, effective sharpening, simply place the blade in the slot and gently pull it through a few times. If you want to use a sharpening steel, just make sure it has a higher hardness factor that the knife to be sharpened. One more important thing: dont' eve hone serrated knives. The must be sharpened by a professional or replaced. Period.
It's up to you if you want to use a sharpening steel or a handheld knife sharpener for honing your knives. The handheld is really easy to use. For fast, effective sharpening, simply place the blade in the slot and gently pull it through a few times. If you want to use a sharpening steel, just make sure it has a higher hardness factor that the knife to be sharpened. One more important thing: dont' eve hone serrated knives. The must be sharpened by a professional or replaced. Period.
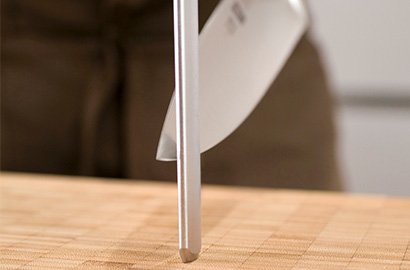
2. FIND THE PERFECT ANGLE
Ok, let's get started. First holkd the sharpening steel point down on a table or a cutting board. The angle between the blade and the steel should be approximately 15 degrees for ZWILLING knives. Santoku knives and all MIYABI and Kramer made by ZWILLING knives need to be 9-12 degrees.
Ok, let's get started. First holkd the sharpening steel point down on a table or a cutting board. The angle between the blade and the steel should be approximately 15 degrees for ZWILLING knives. Santoku knives and all MIYABI and Kramer made by ZWILLING knives need to be 9-12 degrees.
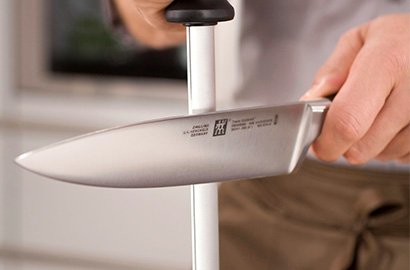
3. MOVEMENT
Pull the knife down and across the sharpening steel, moving from the heel of the knife to the tip. Then switch sides. The first few strokes should use more pressure and then you should ease up on the pressure until the very last couple of strokes. Repeat this 3-10 times by changing sides after every stroke.
Pull the knife down and across the sharpening steel, moving from the heel of the knife to the tip. Then switch sides. The first few strokes should use more pressure and then you should ease up on the pressure until the very last couple of strokes. Repeat this 3-10 times by changing sides after every stroke.
Stoning Your
Knife
REGROUND THE CUTTING EDGE
If the cutting edge can no longer be renewed by honing, it has to be reground to bring on a new edge. It's time to re-sharpen your knife. Let us show you how.
If the cutting edge can no longer be renewed by honing, it has to be reground to bring on a new edge. It's time to re-sharpen your knife. Let us show you how.
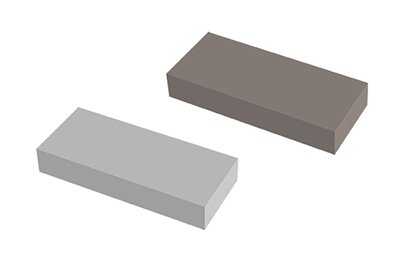
1. PREPARATION
To sharpen, you can use a sharpening stone. Before using, immerse the stone in water for approximately five minutes. Then, place the non-slip side of the stone facing down into a wooden base. For best results, maintain the wetness of the stone throughout the entire process. A grey liquid is produced during sharpening. This is normal and improves the effectiveness.
To sharpen, you can use a sharpening stone. Before using, immerse the stone in water for approximately five minutes. Then, place the non-slip side of the stone facing down into a wooden base. For best results, maintain the wetness of the stone throughout the entire process. A grey liquid is produced during sharpening. This is normal and improves the effectiveness.
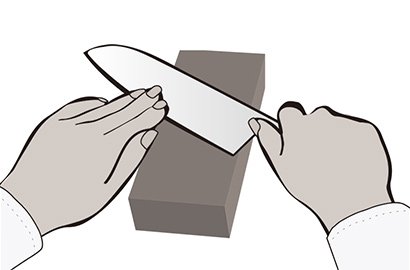
2. ALIGNMENT
Now hold the handle of the knife firmly in one hand and, with the blade facing you, place it on the sharpening stone at an angle of 10-20 degrees. Make sure that there is a gap less than a 1/4 inch between the back of the blade and the sharpening stone. Place your free hand on the blade, but never directly on the cutting edge. We are pretty serious about this one. Touching the cutting edge can lead to some serious injuries so please be careful.
Now hold the handle of the knife firmly in one hand and, with the blade facing you, place it on the sharpening stone at an angle of 10-20 degrees. Make sure that there is a gap less than a 1/4 inch between the back of the blade and the sharpening stone. Place your free hand on the blade, but never directly on the cutting edge. We are pretty serious about this one. Touching the cutting edge can lead to some serious injuries so please be careful.
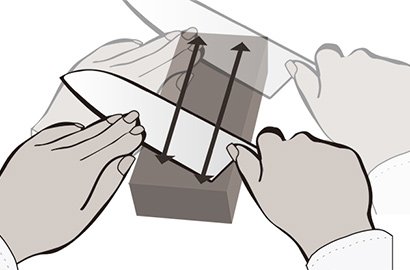
3. MOVEMENT
Now move the blade - with a little pressure - in regular strokes up and down across the sharpening stone. Always maintain the angle between the blade and the stone. You will notice a burr become visible after five or so strokes. Mentally divide the blade into three parts if the knife has a large blade. Always start with the tip and work back towards the bolster.
Now move the blade - with a little pressure - in regular strokes up and down across the sharpening stone. Always maintain the angle between the blade and the stone. You will notice a burr become visible after five or so strokes. Mentally divide the blade into three parts if the knife has a large blade. Always start with the tip and work back towards the bolster.
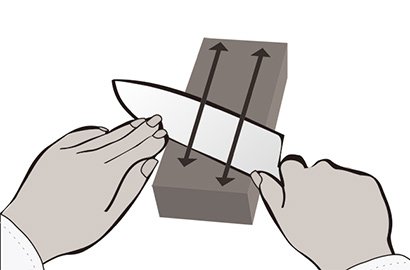
4. CHANGING SIDES
Now turn the knife so that the blade is no longer pointing towards your body. Continue to maintain the angle of 10-20 degrees and the gap of approx. 5mm from the back of the blade to the sharpening stone. Slide the cutting edge up and down over the sharpening stone. Grind both sides of the blade alternately, around five to ten times on each side.
Now turn the knife so that the blade is no longer pointing towards your body. Continue to maintain the angle of 10-20 degrees and the gap of approx. 5mm from the back of the blade to the sharpening stone. Slide the cutting edge up and down over the sharpening stone. Grind both sides of the blade alternately, around five to ten times on each side.

5. REMOVING THE BURR
To remove the resulting burr from the knife, draw the knife in a curve from top left to bottom right across the sharpening stone. Then hold the knife under running water to remove all residue and dry it carefully. Store the stone in a cool, dry place - away from direct sunlight.
To remove the resulting burr from the knife, draw the knife in a curve from top left to bottom right across the sharpening stone. Then hold the knife under running water to remove all residue and dry it carefully. Store the stone in a cool, dry place - away from direct sunlight.
The Final
Sharpness
Test
You can use a sheet of paper to check the sharpness of your knife. If the blade is perfectly sharp, it will glide through the sheet of paper without serious pressure or scratching. If you are not yet satisfied with the sharpness of your knife, repeat the sharpening until you have achieved the desired result.